
A simple and easy way to convert fresh, juicy raw produce into a snack with a shelf life measured in years rather than days- dehydrating fruit. You can dry apples, apricots, strawberries, peaches, pears, cherries, bananas willingly mangoes pineapple blueberries and many other fruits at home with a good dehydrator.
Dehydrating Fruit in principle means removing a lot of moisture and leaving the concentrated taste. Dehydrated fruit is also light and convenient to pack for school, work, hiking, travel or simply an on-the-go snack.
Dehydrated fruit, on the other hand, takes up hardly any space in comparison to canning. Fruit, once sufficiently dried and cooled, is ready for packing into airtight containers or bags for Storage.
Why Dehydrate Fruit at Home?
When you dehydrate at home, you are in control of the ingredients, texture and end product. You can pick ripe season fruit, cut it yourself, and you will not be adding any extras!
Depending on the fruit, slice thickness, temperature and drying time, dehydrated fruit may be chewy, leathery, crisp or a little bit soft.
In fact, it is a great Preservation tactic when you find yourself with more fruit than your family can eat fresh. You need to decrease the wastage of berries like strawberries, apples, peaches or pears and process them into shelf-storable homemade snacks.
The food Dehydrator also helps you work with multiple trays simultaneously, which allows you to prepare several foods in one go.
What Are the Best Fruits to Dehydrate?
Almost any fruit containing enough moisture can be dehydrated, but some varieties produce especially good results.
Apples: Slice them thinly and evenly. Apples can be pretreated to reduce browning and can also be sprinkled with cinnamon for a flavorful snack.
Strawberries: Strawberries are easy to prepare. Remove the tops, slice them evenly, and arrange them in a single layer.
Apricots: Cut ripe apricots in half, remove the pits, and expose more of the fruit surface to the airflow.
Peaches: Ripe but firm peaches work well. Remove the pit and slice or cut into smaller sections.
Pears: Choose ripe pears that are not overly soft. Peel, core, and slice before drying.
Cherries: Remove the pits and cut the cherries in half. Because cherries contain considerable moisture, they can take substantially longer to dry.
Bananas: Slice bananas into consistent pieces. Thinner slices generally become crispier.
Mangoes: Peel and cut mangoes into thin strips. They can become pleasantly chewy after drying.
Pineapple: Fresh or properly prepared pineapple makes a naturally sweet and chewy dried snack.
The most important thing is to use fruit that is fresh and free from spoilage. Overripe or damaged fruit can produce inconsistent
How to Prepare Fruit for Dehydrating
First wash it properly. Trimming any stems, cores, pits, seeds, peels or damaged portions as needed.
Cut fruit into pieces / slices of approximate even thickness. This is critical because thin pieces dry faster than thick pieces and hence it does not correspond to the importance of each piece.
Place them in a single layer on the dehydrator trays. There should be space between the fruit because airflow will get blocked and longer drying time.
Pretreatment is necessary as well for some fruits, especially apples, pears, peaches and apricots. A mixture of lemon and water can prevent browning.
One of the most common mixtures consists of lemon juice and water. Fruit can be briefly immersed in the mixture before draining and putting it on the trays.
Pretreatment is optional for most fruits, so you can choose between treated and untreated fruit upon which to base your appearance and flavor preference.
Dehydrating Fruit Temperature and Time
There is not one specific drying time that is suitable for all the fruits. Your outcome can differ as a result of temperature, humidity, number of fruit particles chosen, slice thickness on the machine, freshness of the fruit and how much loaded into the machine.
Fruit is generally set at around 125°F to as high as 135°F but the actual temp range really depends on the fruit and directions based on the dehydrator manufacturer.
As a general starting point:
| Fruit | Preparation | Approximate Drying Time |
|---|---|---|
| Apples | Slice about ¼ inch; pretreat if desired | 6–10 hours |
| Apricots | Halve, pit, expose fruit surface | 6–12 hours |
| Strawberries | Remove tops and slice | 4–6 hours |
| Cherries | Pit and halve | Several hours to much longer |
| Peaches | Pit and slice | 6–12 hours |
| Pears | Peel, core, and slice | 6–12 hours |
| Bananas | Slice evenly | 6–10 hours |
| Mangoes | Peel and slice into strips | 8–12 hours |
| Pineapple | Peel, core, and slice | 8–14 hours |
These are only starting estimates. Always judge the finished fruit by its texture rather than relying only on the clock.
Fruit should generally be dried until it reaches the texture you want. Some fruit is naturally leathery, while other pieces can become crisp.
Avoiding Common Dehydrating Fruit Mistakes
One of the classic blunders is cutting fruit into differently sized chunks. Slicing thinly may dry out; slicing thickly leaves soft on the inside.
Overcrowding the trays is another blunder. Assemble Me> Air has to be allowing for the parts to move around themselves.
Too much heat is an issue too. For example, if the outside of fruit dries too fast, the surface can end up dry and hard while moisture gets stuck inside. This is often referred to as case hardening and this can hinder complete drying.
Another frequent error is stopping the process prematurely. Fruit that looks dry on the outside has moisture inside it. Let it cool and then see the final texture.
Is Dehydrating Fruit Good for You?
Dried fruit can be eaten as a convenient aspect of a balanced diet. It keeps much of the nutrients naturally found and fresh fruit, but dehydration is depleting the water content that concentrates above natural fruit sugars and calories by weight.
This is why portion size is crucial, as dried fruit is smaller and easier to rheumatoid arthritis. In fact, a small amount of dried fruit may count for much more fresh fruit than it appears.
Making your own dehydrated foods allows you to control what else gets added in. You can create fruit without the any-cost sexy sugar, fake colors or additives.
Nonetheless, dry fruits aren’t necessarily better-for-you than fresh fruits in all cases. Most raw fruits are so hydrating, also normally they are larger in quantity which brings a lot more satiety.
Is It Worth Dehydrating Your Own Fruit?
For many households, yes. This is particularly helpful during the time when fruit are cheap and readily available for home drying.
Or purchase in season fruits and dehydrate them by the batch, then have readily available Snacks to munch on. It is also beneficial to gardeners who often have more garden produce than they can eat fresh.
A dehydrator can be more than just for fruit. Depending on the model, others can machine vegetables, herbs, fruit leather and more.
The most important benefits are: convenience, customization, less food waste and space-efficient.
5 Best Fruit Dehydrators for Home Use
1. Cosori Fruit Dehydrator, 6 Stainless Steel Trays
If you want a dehydrator with at least six drying trays, the Cosori is a versatile option — there are six stainless steel trays, 6.5 square feet of drying space and digital temperature controls from 95°F to 165°F. Its rear fan blows air across all trays simultaneously for an even dry, while its powerful 600-watt motor runs in conjunction with an adjustable timer that can last up to 48 hours, producing not only dried fruit but also facilities for making fruit leather (a mesh screen and a fruit roll sheet included). The best part? Dishwasher-safe trays make clean-up easy.
Pros
- 6.5 sq. ft. of generous drying space
- Six stainless steel trays
- Adjustable temperature from 95°F–165°F
- 48-hour timer
- Includes mesh screen and fruit roll sheet
- Dishwasher-safe trays for easy cleanup

Cons
- 600 watts may use more energy than smaller dehydrators
- Takes up more counter space
- Six trays may be more than needed for occasional users
2. NESCO FD-75A Snackmaster Pro Fruit Dehydrator
The NESCO FD-75A Snackmaster Pro is a380-watt dehydrator that applies top-down Converga-Flow airflow to circulate heated air on the surface pans without rotating any trays. With temperature control from 95°F to 160°F, children may easily utilize it and also its tray can expand from five to twelve ovens, making this equipment suitable for novices too along with even bigger batches. It also comes with fruit roll sheets and clean-a-screens that make it convenient for dried fruits and fruit leather too.
Pros
- 600-watt drying power
- Converga-Flow airflow reduces the need for tray rotation
- Adjustable temperature from 95°F to 160°F
- Expandable from 5 to 12 trays
- Includes fruit roll sheets and clean-a-screens
- Good for fruit, vegetables, and fruit leather

Cons
- Plastic trays may feel less durable than stainless steel
- Larger setups can take up considerable space
- No digital temperature display or timer
3. Excalibur Fruit Dehydrator 8-Tray
With 8 chrome trays and horizontal airflow providing even drying of foods without the hassle of tray rotation, the Excalibur is a top choice with ample capacity for maximum efficiency at 7.2 square feet. It features a 85°F-165°F temperature range, an 80-hour digital timer and clear glass doors making it practical for homes that regularly dehydrate large batches.
Pros
- Large 7.2 sq. ft. drying capacity
- Eight chrome trays
- Even horizontal airflow
- Wide 85°F–165°F temperature range
- 80-hour digital timer
- Clear glass doors for easy monitoring

Cons
- Larger footprint requires more counter space
- Higher capacity may be unnecessary for occasional users
- Can be more expensive than smaller dehydrators
4. Small Fruit Dehydrator Dryer
For smaller kitchens, a small five-tray dehydrator is an appropriate choice, providing adjustable temperatures between roughly 104°F to 158°F that works for drying fruit, vegetables, herbs, mushrooms and other foods. It’s a good occasional option for dried fruit and home-made snacks – its compact design means it’s easy to use and clean as well with removable trays.
Pros
- Compact and space-saving design
- Five trays provide useful drying capacity
- Adjustable temperature from about 104°F to 158°F
- Suitable for fruits, vegetables, herbs, and mushrooms
- Removable trays make cleaning easier
- Good choice for occasional use

Cons
- Smaller capacity than large dehydrators
- Limited temperature range for some specialized foods
- May not be ideal for large batches
5. OSTBA Food Dehydrator, 5 Trays
OSTBA The five trays are BPA-free, digital controls and a temperature range of 95 °F to 158 °F as well as a good sash 72-hour timer. Its 360 degree permeation allows for even heat distribution and the transparent window makes it easy for monitoring. Ideal for small kitchens, dehydrator is suitable for fruit leather, herbs, vegetables, jerky and pet treats!
Pros
- Five BPA-free trays
- Adjustable temperature from 95°F to 158°F
- 72-hour timer
- 360-degree circulation airflow
- See-through window for easy monitoring
- Suitable for fruit leather, herbs, vegetables, jerky, and pet treats
- Compact and space-saving design

Cons
- Five trays may be limiting for large batches
- Temperature range is narrower than some premium models
- Compact size may not suit frequent bulk dehydration
How to Store Dehydrated Fruit
Last but not least the drying process should be followed with Proper Storage. Once the fruit is nice and dry, cool it to room temperature.
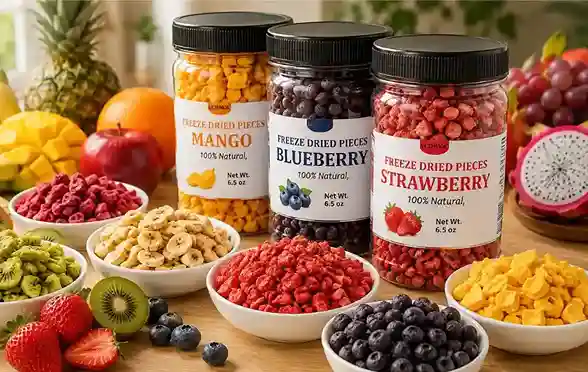
Store the dried fruit in airtight containers, resealable bags, or other types of moisture-proof packages. Keep in a cool, dark, dry place.
Conditioning allows you with more batch to check if any moisture is still there. Store dried cooled fruit in a container and check it after a few days. Should you see condensation, we need more drying time on the fruit.
Always check stored fruit periodically for unusual moisture, mold, or off odors.
Conclusion
If you need a portable food, dehydrating fruit is another preservation technique that makes light weight snacks out of fresh produce. If you prep, slice, dry and temperature control well enough, you can create homemade Snacks from pretty much any fruit out there.
While there is a variety of styles available to you-5-tray and 8-tray options, etc-the trick is having consistent airflow during the dry cycle at the right temperature to achieve the desired texture. Storage ensures that when completely dried and cooled, your homemade fruit is good for throwing in lunch boxes, cooking with on easy-going getaways and hikes, or snacking day to day.
Frequently Asked Questions
What are the best fruits to dehydrate?
Apples, strawberries, apricots, peaches, pears, cherries, bananas, mangoes, and pineapple are excellent choices. Apples and strawberries are especially beginner-friendly.
Is dehydrating fruit good for you?
Dehydrated fruit can be nutritious and convenient, but the removal of water concentrates natural sugars and calories by weight. Portion size is important.
What are some common mistakes in dehydrating?
Common mistakes include uneven slicing, overcrowding trays, using excessive heat, stopping the process too early, and storing fruit before it has cooled completely.
Is it worth dehydrating your own fruit?
It can be worthwhile if you enjoy homemade snacks, buy seasonal fruit in bulk, have excess garden produce, or want a convenient method of food preservation. A good dehydrator can also be used for vegetables, herbs, and fruit leather.
Also Read: 5 Best Dehydrating Raspberries (Whole or Berry Bits)
Also Read: How to Dry Blueberries
Also Read: How to Dry Pineapple (Fresh or Frozen)
Also Read: How to Dry Apples
Also Read: Dehydrating Strawberries: Complete Guide for Sweet Homemade Snacks
Also Read: Fruit Leather Recipe: How to Make Homemade Fruit Rollups


1 Comment
[…] Also Read: Dehydrating Fruit: Easy Guide to Drying, Preservation, and Storage […]